Infrastructure Configuration
The Infrastructure module contains the fundamental configuration for EPMware's connection to target systems and environment management. This section covers server configuration and multi-environment setup.
Servers
Server Configuration enables administrators to configure the connection details that EPMware uses to communicate with target systems (e.g., HFM, Essbase, Planning, PBCS). Each server entry stores credentials and connection information for secure communication.
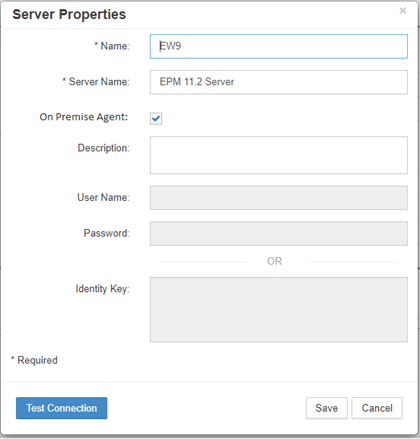
Server configuration screen showing connection settings
Server Configuration Fields
- Name - User-defined label for the server
- Server Name - Hostname or IP address for on-premise applications; any label for cloud applications
- On-Premise - Enable for on-premise servers; disable for cloud applications
- Agent Polling - Enable to allow agent polling
- Description - Optional description of the server
- User Name - Required if On-Premise Agent is not installed
- Password or Identity Key - Authentication credentials (not required when using On-Premise Agent)
Note
If the On-Premise Agent is checked, the User Name, Password, and Identity Key fields are disabled as the agent uses the REST API to establish connections.
Add a Server
-
Select the + icon to display the Add Server popup.
-
Input a Name (label) for the server.
-
Input the Server Name for on-premise applications or any label for cloud applications.
-
Check On-Premise for on-premise servers or leave unchecked for cloud applications.
-
Check to enable Agent Polling if required.
-
Input a Description (Optional).
-
Input User Name and Password or Identity Key (only needed if the On-Premise agent is not installed).
-
Select Save to save the configuration.
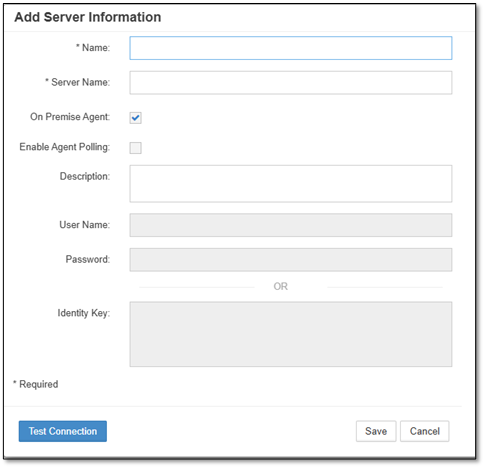
Add Server dialog with configuration fields
Test Connection
Click the Test Connection button to verify communication with the server before saving.
Edit a Server
-
Right-click on a row and select Edit Properties from the menu.
-
Edit the properties as required.
-
Select Save to save the changes.
Warning
Changes to server configuration may affect existing deployments and application imports. Test connections after making changes.
Delete a Server
-
Right-click on a row and select Delete from the menu.
-
The confirmation popup will display.
-
Select OK to delete the server.
Note
Only one server can be deleted at a time. You cannot delete a server that is currently in use by an active application.
Multi-Environment Configuration
A multi-environment configuration allows EPMware to deploy metadata to multiple environments (e.g., Development, UAT, and Production) using a single workflow. This enables consistent metadata management across the entire application lifecycle.
Configuration Overview
Multi-environment deployment consists of the following components:
- Shell Applications - Non-production application representations
- Environments - Logical environment definitions
- Deploy Stages - Workflow stages for each environment
- Deploy Tasks - Tasks assigned to each deployment stage
- Environment Mapping - Application-to-environment relationships
Environments
Environment configuration creates the foundation for multi-environment deployments. Each environment represents a tier in your application landscape.
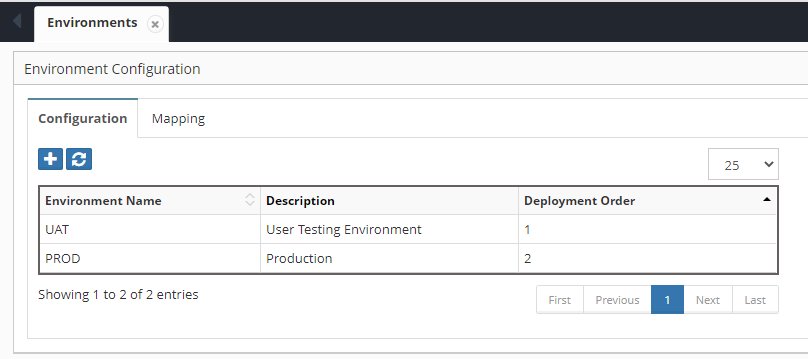
Environment configuration showing deployment order
Add an Environment
-
Select Configuration → Infrastructure → Environments.
-
Select the + icon to display the Add Environment popup.
-
Input a Name (label) for the environment.
-
Input the Deployment Order for the environment.
-
Lower numbers deploy first (e.g., Development = 1, UAT = 2, Production = 3)
-
Select Save to create the environment.
Edit an Environment
-
Right-click on a row and select Edit Properties from the menu.
-
Edit the properties as required.
-
Select Save to save the changes.
Delete an Environment
-
Right-click on a row and select Delete from the menu.
-
Confirm the deletion in the popup.
-
Select OK to delete the environment.
Warning
Deleting an environment will affect any workflows configured to deploy to that environment.
Environment Mapping
Environment mapping associates application names with their respective environments. This allows EPMware to understand which applications belong to which environment tier.
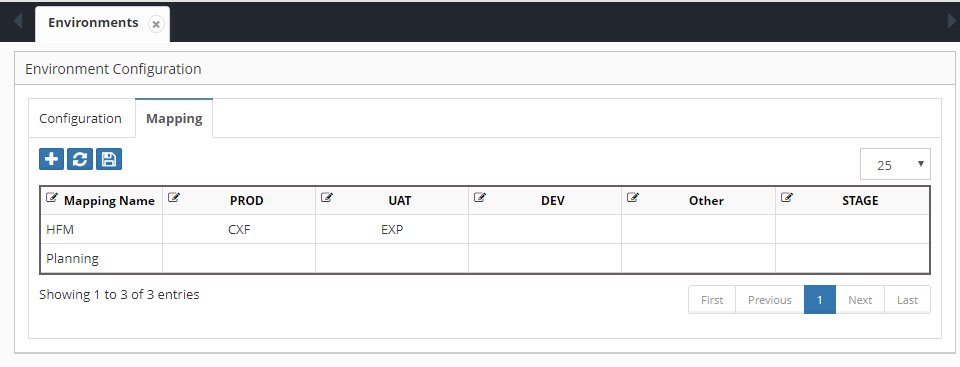
Environment mapping showing production and UAT applications
In the example above: - CXF is the HFM Production application managed in EPMware - EXP is the HFM UAT "shell" application (metadata not managed in EPMware)
Shell Applications
UAT and Development applications should be created as "shell" applications in EPMware. These are logical mappings only—their metadata is not managed in EPMware. A security class should restrict these shell applications to administrators only.
Configure Multi-Environment Deployment
Step 1: Create Shell Applications
-
Navigate to Configuration → Applications → Configuration.
-
Create application entries for non-production environments (UAT, Dev, etc.).
-
Assign a restricted security class to prevent general user access.
Important
Shell applications appear in the application dropdown but have no dimensions in EPMware.
Step 2: Create Deploy Stages
-
Navigate to Workflow → Workflow Builder.
-
Select the workflow from the dropdown.
-
Click Actions and select Create Stage.
-
Configure the deploy stage:
- Input a Stage # to define order
- Input the Stage Name
- Select Deploy for the Action
-
Input an optional Description
-
Select Save to add the stage.
-
Repeat for each environment in your configuration.
Step 3: Create Deploy Tasks
-
Navigate to Workflow → Tasks.
-
Click the + icon to create a new task.
-
Select Deploy from the Action dropdown.
-
Select the Environment from the dropdown.
-
Configure additional task properties as needed.
-
Select Save to create the task.
Step 4: Assign Deploy Tasks to Stages
-
Return to Workflow → Workflow Builder.
-
Select the deploy stage from the workflow diagram.
-
Select Assign Task from the Actions dropdown.
-
Select the deploy task created in Step 3.
-
Select Save to assign the task to the stage.